About Me

My photo
A young and slightly ignorant woman who has always loved baking and cooking, I want to make people happy with food as often as I can. I'm here to whisk away and explore!

Thursday, February 28, 2013

February's Favorites

So I think I'm going to start recapping the awesome things that happen every month. You know, the things I'm enjoying, the things you dear people are enjoying. The highlights of the month so to speak.
I like thinking back over the month and seeing the things I've made or the stuff I've learned.
It will be fun. Let's start, shall we?

Things I am diggin' about Febrary:
-Infused ingredients. 
I recently tried infused honey--Awesommmme! Cranberry Orange Honey? Newest obsession. I've been drinking tea all the time now. Not that I didn't drink tea before. But I might be averaging close to four cups of tea a day now. I also have in my possession two infused vinegars: nettle and dandelion and elderberry ginger. I haven't tried anything with them yet but I think a salad dressing with those could be monumentally amazing. And thus my infusion dreams begin. I want to try my hand at infusing everything! Olive oil, honey, vinegars, making my own extracts...this spring will hold some of these infusing adventures, I'm sure. I can't wait.

-Kitchen Volunteering. 
My church eats so much food. This is not a bad thing at all. Good things happen when people get together to eat with one another. But our main kitchen volunteer is getting worn down cooking huge meals three to five times a week. So I've volunteered to cook a meal for the ministry leaders meetings every quarter to help her out. This first one was this past month and I had lots of fun. I actually spent one whole Saturday making almost 400 homemade meatballs for Italian sub sandwiches. (It was such a good Saturday, let me tell you.) I got to use the church's commercial convection oven, which is so cool! I am thinking of signing up to do a few more volunteer meals or maybe start making desserts for bible studies. I love food and I love making people happy, so I am looking forward to future kitchen volunteering times. :)

-Care Packages. 
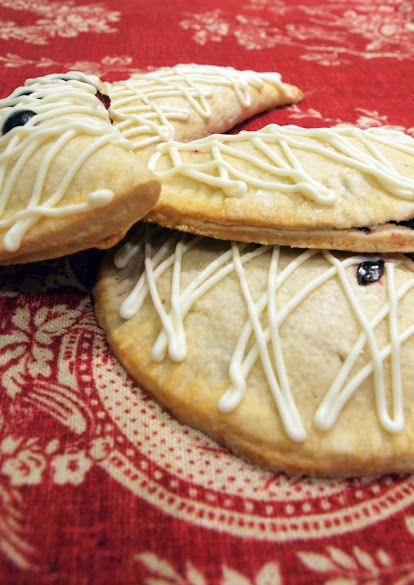
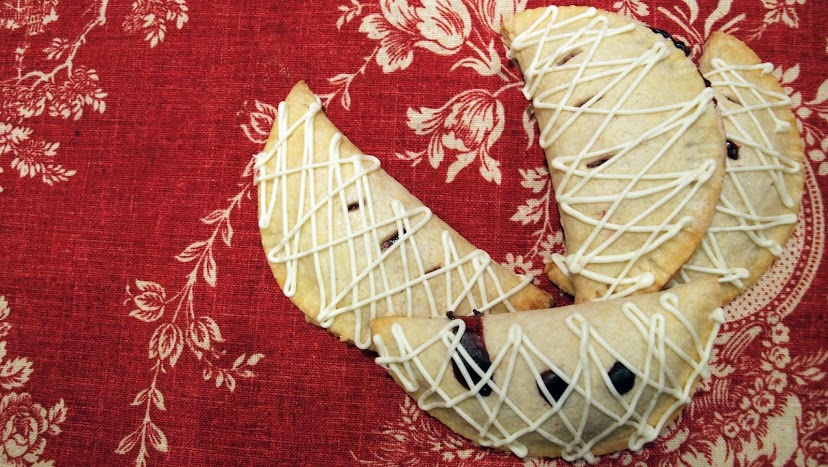
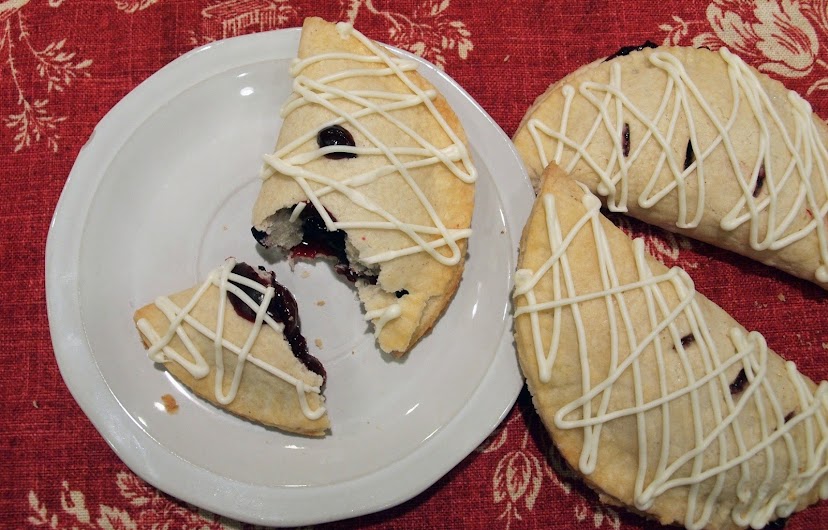
Since February is the month of Valentines, I was able to send out little packages of happy cookies to some people I love. Mainly this one and this one. Making really extensive time consuming cookies was a blast. Probably not something I want to do every month, but it was worth it. :) Word of kitchen wisdom to anyone looking for a three step program for improving relationships? Step 1: Make cookies. Heart shaped cookies work exceptionally well. Step 2: Give cookies to people you like. Step 3: Bask in the love....
Valentine's Heart Cookies for my Care Packages...
-Creperies.
I was able to finally visit a creperie this month! I've wanted to for awhile, especially since I had a Christmas Crepe Dinner Party this past year. Creperie Voila is a super cute crepe stand in downtown Seattle. They have amazing crepes that they make right there while you watch. So cool. My favorite one was the "Seasonal Crepe" which had fig and apple compote with Chevre cheese. Oh wow. I came home and immediately looked up how hard it was to raise a goat. That goat cheese was life changing, I'm serious. I've made simple crepes at home which turned out really good, but I'm planning on recreating that recipe because it is like a disco on your taste buds.
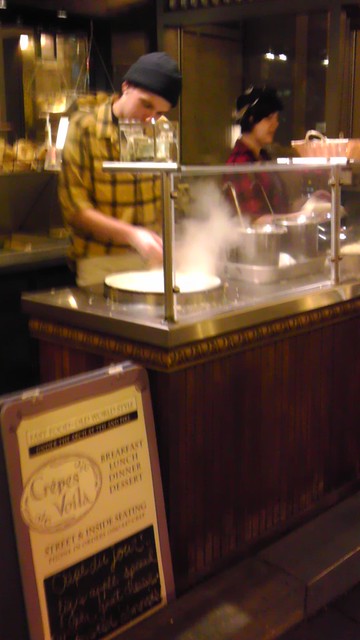
My poor instagram picture of Hipster Dude making my astoundingly delicious crepe.
My Favorite Pinterest Finds this Month:
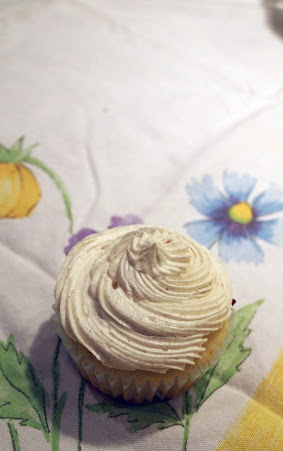
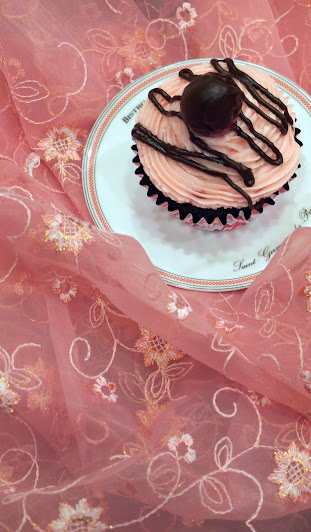
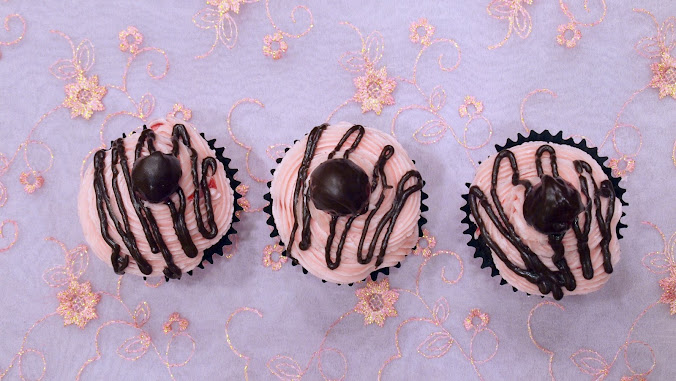
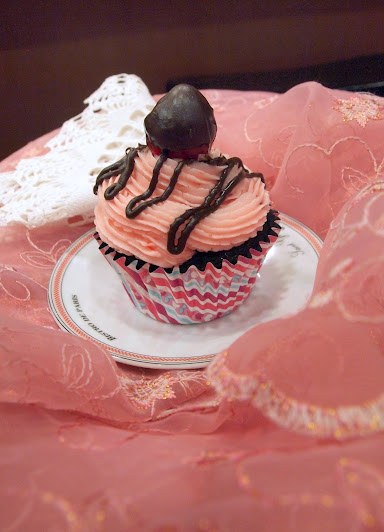
Cupcake Art. I wish I knew whose work this is...the link is a dead end. 
 

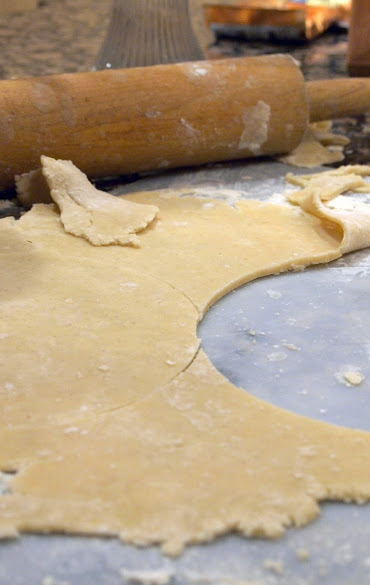
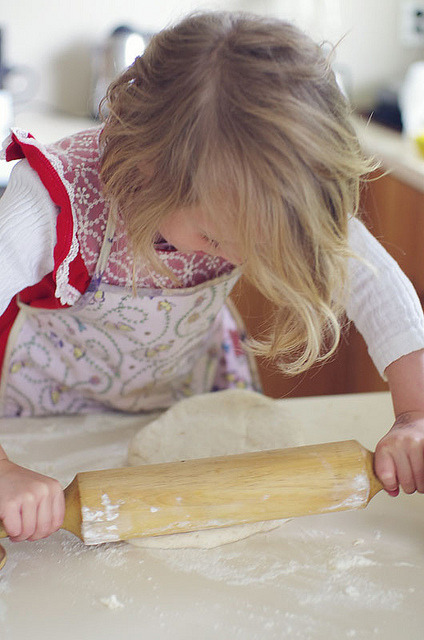
Rolling the Pizza Dough by Le Fabuleux Destin d'Amelie on Flickr. This little girl is adorable.


 Strawberry Hearts Pound Cake by Go Bold with Butter. I didn't get around to making this for Valentine's Day this year, but it definitely going on the list for next! It's too cute.

 ____________________________________________________________________________

Things You're Diggin' about February:

Most Pinned Post on Pinterest: Sea Turtle Cake

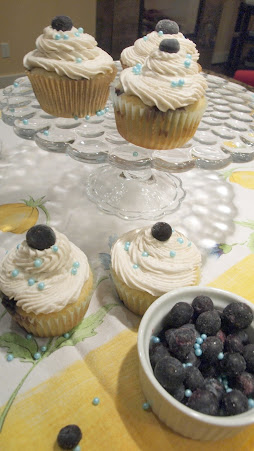
 Most Liked on Facebook: Blueberry Cobbler Cupcakes

Hope this past February was a great one for everyone, here's to an even better March!
-Candice


Sunday, February 24, 2013

Bernie the Bug and Banana Muffins Make an Appearance

I haven't talked too very much about my job here on my blog. Mostly because no one wants to hear a rendition of the "Johnny Test" theme song, tips on how to break up a wrestling match between two brothers, or stories of the mornings spent cleaning up cat puke, making pb and j sandwiches, washing another family's dinner dishes from the previous night and coercing the world's most argumentative 7 year old into the shower. (and that's a good morning...)
Somedays I really really can't wait til I can stop being a nanny. It is a very hard job. Other days when a 5 year old comes up to me, wraps herself around my ankles and says "We're playing the hugging game and I'm gonna win. I'm gonna hug you to death." Well...let's just say being a nanny ain't so bad.
You learn a few lessons when you are a nanny. One of the earliest lessons learned: Kids can be frightened into anything by the most ridiculous things. Unreasonably so. I still remember the time the boys told me that Bigfoot was in fact real and I should lock the doors to make sure one didn't break in while they were sleeping.


Oy vey.
This past Friday, Fish walked in the house, threw his backpack on the floor and announced that he learned all about Bernie the Bug at school. Further conversation and with the help of a badly drawn coloring page attached to a Destist Office business card informed me that Bernie the Bug was a tiny monster with sharp teeth, suction cups for toes and fingers, and a faucet like nose. He lived in your mouth, took in sugar with his hideous monster mouth, turned it into acid that then squirted from his nose and rotted away at your teeth. (There's a lot of teeth going on here.) Bernie the Bug then used his suction cup extremities to stick himself inside the teeth and kill the "brains" (I'm guessing this is 7 year old speak for "root", I'm not really sure. At this point I was flabbergasted. What kind of dentist tells kid things like that??) For the next two hours Fish would eat nothing. Not. A. Thing. Bernie the Bug was lurking behind every after school snack with evil intentions. And when he saw Princess Kitty later, the first thing he told her was that Bernie the Bug was out to get them and their teeth.  Try as I might, I could not convince them that Bernie the Bug was just a fictional character invented by dentists everywhere. Nothing I said could penetrate their frightened little minds. Bernie the Bug is now just as real and scary as Bigfoot.


So thinking about my little wards and their new fear of sugary treats, I set off to make not cupcakes, not cookies, not a creme brulee, but a good old "healthy" baked good: a muffin.
Banana Walnut White Chocolate Muffins.


Okay, so that word up there "heatlhy"? You can ignore that if you want. These do have white chocolate chips in them I guess. But to me, they are healthy. Because I thought a good hour about putting frosting on them and because I didn't: healthy. Take it or leave it folks.

Excited to eat Muffffiinnnns!
Also, I had two muffins to photograph here. Within the aforementioned hour my family somehow disposed of the ten other muffins. They are so light and fluffy, it was impossible to only eat one. Usually I can take photos the morning after I bake something. I realized 45 minutes after pulling them from the oven that this wasn't going to be the case. I needed to get pictures tonight. They wouldn't not last. I was right. As soon as I took the pictures me and my brother ate them. There's one thing for sure: we might be scared of Bernie the Bug, but calories? Nope. We are fearless.

Banana Walnut White Chocolate Muffins
1 cup flour
1/2 tsp baking powder
1/2 tsp baking soda
1/4 tsp salt
1 stick of softened butter
1/2 cup sugar
1/4 cup sour cream
1 1/2 tsp vanilla
2 eggs
2 mashed overripe bananas
1/2 cup chopped walnuts
1/2 cup white chocolate chips
Whisk together flour, baking soda, baking powder, and salt in a small bowl and set aside.
Cream butter and sugar together until fluffy, about three to five minutes. Add the vanilla and eggs, beating after adding each. Scrape down the bowl and beat again. Add in the sour cream and bananas, mixing until well combined. Last, add the dry ingredients and mix until just combined. Fold in the nuts and white chocolate. Scoop into muffin tins and bake at 350 for 18-22 minutes, or until a toothpick comes out clean.
The Blanketed Banana Muffin Stealing Boy.  
Eat as soon as they are cool enough for you to not burn yourself when trying to take the wrapper off. Because they are that awesome. And you are that awesome, which means you deserve to eat a (kinda) healthy muffin that tastes like heaven.

Tuesday, February 19, 2013

Things an 11 year old says...

There are three boys here, all under the age of 12, enjoying the sunshine and blue sky. There are basketballs, legos, sticks, and all sorts of boy things.
They are funny and say funny things.

JM: Candice?
Me: Yes?
JM: I feel like you are the type of person who if you were ever a queen, you would have a royal mouse catcher in your castle.
Me: Yes, I probably would
*several minutes of silence*
Me: Actually, I would probably have three.
JM: One for cuteness, one for sleeping with, and one to actually catch the mice...


JM: "I want a elephant that changes colors with his moods. Like a mood ring. And his name would be Disco. He would have to be an Indian elephant."
Me: "Why not an African elephant?"
JM: "It just wouldn't feel right."


K: "You wash your food?"
JM: "Yeah...apples have wax and pesticides and stuff on them."
K: "How weird!"

K: "There's a kind of fish that can be on land. Did you know that?"
JM: "What's it called?"
K: "A dead fish. HAHAH!"


They also eat cupcakes, of course. Particularly these blueberry cobbler ones.
Vanilla cupcakes, filled with blueberries, and frosted with vanilla cinnamon buttercream. Oh, sorry about that. Vanilla cinnamon awesome-cream. :)


Vanilla Blueberry Cupcakes
1 1/2 cup flour
1 1/2 tsp baking powder
1/2 tsp salt
1/4 cup of melted butter
2 Tablespoons of vegetable oil
1 cup sugar
1 egg
1 tsp vanilla 
1/4 cup unsweetened vanilla yogurt
2/3 cup buttermilk
1 cup frozen blueberries
Whisk together the flour, baking powder, and salt in a bowl. In a mixing bowl blend the melted butter, oil, and sugar. One at a time, beat in the egg, vanilla, and yogurt. Add flour and buttermilk alternately in three parts. Stir until it's just combined. Fold in the berries. Fill cupcake wrappers 3/4 of the way full and bake at 350 for 20-22 minutes. The tops will stay pretty pale, but don't overbake them. Let them cool completely before frosting. 

Cinnamon Vanilla Awesome Butter Cream
1 pound powdered sugar
scant 1/2 cup milk
1/4 tsp salt
1 stick soft butter
1 c shortening
1 tsp vanilla
2 tsp ground cinnamon
Whisk together the sugar, salt, vanilla, cinnamon, vanilla and milk in a stand mixer until creamy. Add butter one slice at a time, beating well in between each addition. Add the shortening and beat ten minutes or so until light and fluffy, it will almost double in volume. 


It will be fluffy and delicious and kinda taste as good as a day of sunshine. 

Thursday, February 14, 2013

Happy Valentine's Day!

Hope everyone is having a beautiful Valentine's Day full of chocolate, hugs, and good times. Go ahead and check out past Valentine's posts!
Love and Cupcakes,
Candice


Wednesday, February 13, 2013

Keep Calm and Bake like a Mentally Unstable Person: Homemade Hostess Knock Off Cupcakes

Have you seen these cute little signs? You know...I'm sure you have. They are all popular and inspiring and stuff.


Yeah. See? Everyone thinks they are awesome. And they are kinda cool, I admit it. They even have cute spin offs like so:


Yup. 
And so my motto this past week was....
Keep Calm and Bake like a Mentally Unstable Person
I know, I know. Not as catchy as "cupcakes" but I canna tell a lie. It was kitchen crazy up in here. 
It's because I was stressed. I have been filling out college applications, and FAFSA forms, and credit transfer papers. I've been meeting with Transfer advisors from several schools, campus touring, emailing for references, and writing essays.   
It's been stressful. I generally don't stress too much (it's so much work! Right? Just go with the flow)...but when I do, two things usually happen. 

I bake myself into oblivion. Um. I'm not exaggerating. There are mountains of baked goods that come out of the kitchen. And then I flip my sleep patterns around. I take these really great naps all day long, because sleeping helps stress. It really does! Man, a nap can fix ANYthing. And then I can't sleep at night at all. I usually don't sleep at night anyways, being a self diagnosed insomniac/werido. But when the stress level starts to rise, there is zero sleep happening after the sun goes down. I usually bake all night instead. Ha! Funny how that works. 
I know for some people, they eat happy food when they are stressed (I'm using that word a lot, let's shake it up...) when they are under duress, experiencing consternation, apprehensive, etc. (Much better.)
I personally eat happy food all the time, no matter how I am feeling. But I can appreciate someone turning to comfort food in times of uneasiness. 


So what are some comfort foods I could have had? 
Macaroni and Cheese: Check. I put in bacon, just because. Bacon needs no reasons. 
Pancakes: Yup, blueberry ones.
Tomato Soup and Cheese Toast: Affirmative.
Little Debbie Hostess Cupcakes: Oh. Those are bad for you. Processed food, lots of preservatives. No can do. 
Wrong! You can make homemade ones....
and you can personalize the cute little swirlies for Valentine's Day! 


Sorry guys, I had to squeeze in one more Valentine's dessert before launching myself into Easter recipes. 
The chocolate cake used in these cuties is just my regular old (awesome) chocolate cake recipe. You can find it here. But I'm going to give you the ganache and filling recipes, because that's what really makes the cupcake anyway. 

Homemade Hostess Cupcake Cream Filling
4 Tablespoons softened butter
1 cup powdered sugar
1 teaspoon vanilla extract
3 Tablespoons heavy whipping cream
1 cup marshmallow creme
Beat together the heavy whipping cream and butter til fluffy, about three minutes. Beat in the vanilla. Sift in the powdered sugar and beat until thoroughly  combined. Stir in the marshmallow creme. Refrigerate until needed. 
To Fill Cooled Cupcakes: Fill a pastry bag with your filling and fitted with a star or other wide tip. Poke into the cupcake and squeeze to fill. Now, they are ready to dip! 

Chocolate Ganache
9 oz of chopped chocolate 
3/4 cup heavy cream
I used semi sweet chocolate chips for this recipe because my family loves darker chocolate. But if you want it to taste more like the original Hostess Cake, I would use milk chocolate. Heat the cream in a saucepan until boiling. (Don't worry about it curdling, heavy cream can't curdle unless you boil it a long time, unlike milk.) Pour the hot cream over the chocolate and let sit for three minutes. Whisk the chocolate until smooth. Let sit and cool a bit, and then dip your cupcake in by holding them by their wrappers. 


Monday, February 11, 2013

Hand me that Pie!

Everyone reading this post needs to buckle up and put on a helmet. And maybe a mouth guard. Actually, scratch that, you'll need your mouth for this. 
Because these are officially the best hand pies I've ever made. WHuuuutttt?
 I know. 
I can't decide if it's the filling. Or the crust. Or the little glaze on top. It's probably all of them. When I started out making these pies I was in a bad mood. It had been a long rainy day, I had an extra long work schedule the next day, it was late and I really just wanted to go to bed. 
But I really wanted to get these pies baked so I could deliver them to a coffee shop. I was hoping they would order some of my things to have available at their stand. You know, extra baking=extra moolah. Maybe I could quit my day job! Well, I wasn't so lucky. 

Here they are being cute and un-baked...
They didn't really need any extra baked goods. But it is all perfectly okay! Because I created the perfect pie. Who cares if they won't buy em!? Not me, I can keep them to eat for meeeee. Because I seriously had the hardest time not eating all of them. 
All. Of. Them. 

Happy crust...
Earlier in my baking adventures. (And by "earlier" I mean about three years ago) I hated pie crust. It was so hard to make. It fell apart and flopped everywhere. It stuck to the rolling pin, or was too crumbly. It made me pretty short tempered, which is pretty weird because I get short tempered about very little. (Losing one's patience is just so exhausting. I don't have time for it.)


And then something amazing happened. I made a nice pie crust. 
After that, it was a breeze. I guess I had to come into my own...master the pie ninja skills or something. 

At this point, I was ready to devour all of these. It was an inhuman feat leaving them uneaten.
I had fun taking pictures of these. So I took a lot of them. Sorry. My sister sent me a text saying my food photography was getting better and I was so proud of myself I might have gotten carried away. 


Best-Ever Hand Pies
2 cups sifted flour
1 tsp salt
3 Tablespoons sugar
1 tsp cinnamon
2/3 cup shortening
5 to 7 Tablespoons of cold water
Whisk together the flour, salt, cinnamon, and sugar in a wide metal bowl. The wider the bowl, the better  it is to sprinkle the water over the pastry later on in the recipe. The water will reach more of the flour, making it more flaky and awesome. Cut in the shortening with a pasty cutter or fork until the the pieces are the size of tiny peas. Sprinkle the cold water over the mixture one tablespoon at a time, mixing with a fork in between additions. Form the dough into a ball and flatten in a lightly floured surface. I like to roll it out on a mixing board myself, to avoid messy floury counters later. Roll out the dough to about 1/8 inch thickness. Using a small dessert plate as a template, cut large circles of the dough. Fill each circle with 2-3 tablespoons of filling. Fold over the circles and press the crusts closed by running a wet finger along the edges and sealing with a fork. Poke some air vents in the hand pies. Mix 1 egg with about 1/2 cup of water and brush on the crusts. This will keep them golden. Sprinkle with sugar. Bake the pies at 375 on slightly greased baking sheets until they are golden brown. About 20 minutes. Let them cool and then drizzle with melted white chocolate.  


Favorite "Orchard" Pie Filling
This is our all time favorite pie filling. We make double batches of it to serve on pancakes, over ice cream, to randomly make cobblers. It's amazing. This is a double recipe. Feel free to be a miser and only make half, promptly depriving yourself and your family from having the most stupendous pancakes, ice cream, and cobblers. ;)
4 cups of mixed berries and grapes (this recipe was 2 cups of red grapes, 1 cup blueberries, and 1 cup blackberries. We've used raspberries as well.)
1 cup sugar
A pinch of ginger
3 Tablespoons cornstarch
Zest and juice of one lemon
1 tsp vanilla
2 Tablespoons of butter
2 Tablespoons of juice from berries, or bottled grape juice
Boil Berries, juice, zest, spices, and sugar until sugar is dissolved. Add the cornstarch and butter, cooking until thick and bubbly. About 15 minutes. Let cool slightly before spooning in the crust. 

Sunday, February 10, 2013

Why Coffee is Good in Cookies


It has already been established that Valentine’s Day is awesome.
There is no room for debate on this issue because I unfairly justly implemented cupcakes into my argument. 
Yes. That means I win.
Do you know what else wins? Coffee-Chocolate flavored things. I think this flavor combination is called “Mocha”, but since I am not a coffee drinker I am really not an expert on the subject.
Okay, we are taking a detour here because everyone just went “WAHTTT? You don’t like coffee? Aren’t you a college student living in Seattle? You’re crazy. Coffee is so amazing. It keeps you awake and it tastes good. I love coffee! How can you not like coffee? Coffee…” I don’t like coffee. It tastes like burnt water. Yes, even the so called “good” coffee. It’s gross. I drink it maybe once a month when I am on the verge of physically harming myself because I am so tired and I need caffeine. Usually a cup of tea is enough caffeine for me, (okay, detour within a detour: TEA is amazing. Like the polar opposite of coffee. Okay, back to detour one…) but sometimes when I only have two hours of sleep behind me and I have no hope of getting to bed before 1 or 2 am I have to resort to the evil of coffee to get me through. Ugh.
There. Detour over. We are back to happy things like Valentine’s Day and cookies.
Cookies! Chocolate Coffee cookies to be exact. I usually don’t decorate cookies with Royal icing for two reasons. Reason one is that it takes foreverrrrrr. For. Ev. Er. I could probably get faster if I did it more often and practiced. But I don’t because it takes forever. As aforementioned. But really, it took me about five hours to make thirty cookies start to finish. That’s a lot of hours, amigos.
Reason number two: it just doesn't taste as good as it looks.  And while I like things to look pretty, I like them to taste good more. (That was a terrible sentence grammatically speaking. But it’s okay, this blog is a judge free zone.) Royal icing is so super sweet with no flavor other than just: SUGAR OVERLOAD FLAVOR!! But the chocolate coffee cookies are so intensely dark tasting that a sugar crust to go with it is perfect. It is pretty hard to find a fault with pretty cookies that taste good. :D
And they are perfect for Valentine’s Day! 
  • Chocolate Coffee Cutout Cookies
  • 3/4 cup sugar
  • 1 cup  butter, softened
  • 1 teaspoon baking powder
  • 1 teaspoon vanilla 
  • 1 Tablespoon instant coffee granules
  • 1/2 teaspoon salt*
  • 1 large egg
  • 1/2 cup  cocoa
  • 2 1/4 cups flour
  • Beat together the sugar, butter, baking powder, vanilla, espresso powder, and salt until fluffy.  Beat in the egg. Scrape the bottom and sides of the bowl again.Whisk together the cocoa and flour, then beat into the egg and butter mixture until well blended. Refrigerate the dough for 30 minutes, or up to overnight. Preheat your oven to 375°F. Lightly grease baking sheets. Divide the dough in half. Sprinkle both sides of each piece with extra flour, to keep the dough from sticking. Working with one piece of dough at a time, roll 1/4 in thick. Cut into heart shapes with a cookie cutter. Place the cookies on the prepared baking sheets and bake for 8 to 10 minutes, until their edges are firm and you start to smell chocolate/coffee wafting through your flour covered kitchen. Allow to cool completely before decorating with icing of your choice. 


Thursday, February 7, 2013

Valentines: A little sweetness...

The holiday of love is right around the corner, isn't it?
Happy Valentines Day, everyone! 
I've never been the kind of person who sits grumpily at home on Valentines day and curses everyone that has a cute significant other and declares that February 14th is only a day for Hallmark to ruthlessly swindle the desperate hearts of couples and make them spend lots of money on useless things like roses and chocolate. I like Valentine's day, and I don't really ever remember having a "valentine" to share it with. But it's cute. And fluffy. It involves chocolate. And really, we hate people who get on Christmas, right? Why is Valentine's any different? Why don't we have "The Grinch who Stole Valentine's Day?" Because the world is full of people who resent the love birds around them, that's why. 
So stop the Single Awareness Day phenomenon, eat cupcakes instead! 
Actually, if you are lonely and disgruntled this 14th, shoot me an email with your address and I will personally send you a Valentine. Because I like making valentines. I also really like making Valentine cupcakes too. I was that kid who made all my valentines homemade and then brought cupcakes to the party at school. Yup. 
I also read classic romantic novels that had lines like this one: "Whatever our souls are made of, his and mine are the same." -Emily Brontë
Yeah, I was that kid. You'll have to forgive me. Maybe these can help?
Chocolate Covered Cherry Cupcakes
When I was a wee lass (Or maybe, like, a 23 year woman? Just maybe.) I loved chocolate covered cherries. I know a lot of people find them a less than favorable candy. Tooth achingly sweet and artificial cherries wrapped in chocolate? Um, Yes! I'm sorry, but they're awesome. As are the cupcakes versions. :)
Chocolate Covered Cherry Cupcakes
Chocolate Cupcakes

1 c. cake flour
3/4 c. sugar
1/3 c. cocoa powder
3/4 tsp baking powder
3/4 tsp baking soda
1/4 tsp salt
1/2 c. milk
1/2 c. coffee
1/4 c. oil
1 egg
1 tsp vanilla
Stir together flour, sugar, cocoa, baking powder, baking soda, and salt in a large bowl. Add the remaining wet ingredients and stir until moistened. Divide into cupcake wrappers and bake at 350 for about 12 minutes, or until the tops spring back when touched. 

   Cherry Buttercream
1 stick butter, soft
1/3 c. shortening
3 TB maraschino cherry juice
4 cups powdered sugar
1/4 cup finely chopped maraschino cherries
12 cherries for decorating
Cream butter and shortening. Add juice and mix. Slowly add sugar. Stir in chopped cherries. Pipe onto chocolate cupcakes using a wide opened tip. 
   Chocolate Ganache
9 oz of semi sweet chocolate, shaved
1 c. cream 
Warm the cream to just boiling in a saucepan on the stove top  Pour over the chocolate and stir until all melted and smooth. Fill a pastry bag and drizzle over frosted cupcakes. Dip the 12 maraschino cherries into the remaining ganache and set on the cupcakes. Tada! Your very own valentine...an edible one, score!


Sunday, February 3, 2013

Easy Being Green: Homemade Pesto Rolls

I like green. I have a bright lime green cardigan. Seriously, who has a incandescent neon green sweater? Oh yeah.

I do.

And sometimes I sport it with my key lime green earrings. Or Kelly green nail polish. The two times I painted my bedroom when I was a teenager: green.
I especially like green food. My favorite apples are the green ones. I nearly always order salads when I am at a restaurant. Avacados? Yes.
You get the point.


So given my love for the verde, you would assume that I would be the number one advocate for Pesto. It's the greenest of greenies. I mean, it's a paste.
Made of plants. Really green plants.

But for some reason I can't explain, I've never been able to appreciate Pesto. I really don't know why. It definitely isn't for lack of trying. Whenever I see it my little brain goes: "Oooo! Green food! How tasty. I'm sure I'll like it this time. It's so pretty...." I try it on pasta. I eat it on paninis. I buy it "fresh" from the produce section at the supermarket. Every time it's been a let down.


But, I had never made it before. It seemed like a lot of work for something I didn't enjoy too much. And it would dirty too many dishes, right? Most definitely.


When I had a party to cater recently, they asked for a few dozen pesto rolls to be included in the appetizers. I usually buy a nice container of the aforementioned "fresh" stuff at the nearest grocery store to save time. But for some unimaginable reason everyone was out of stock. Everybody had a pesto run or something and drained the Basil reservoirs. I must have missed the memo.
And thankfully, because it forced me to make my own. It was worth it. This pesto actually tasted good.
Wait.
It tasted awesome! I was ready to put it on noodles, on toast, in a tortilla, mixed with scrambled eggs. I was honestly preparing to pesto-ize the world in a big way.


But I just rolled it up in these crescents. Because that's what I said I would do. I'll to have schedule another day on the calendar to smother the world in pesto, I guess.
Now, I'm giving you this crescent roll recipe because I'm so excited to tell you all about my new found green favorite. But I'm definitely going to be tweaking and twisting this recipe. Because although the rolls were good, the process itself is hard to work with. The dough hardly rises the second time, and it takes for-ev-er. And the roll itself could be softer, more tender...
So take this recipe with a grain of salt. Ha! I'm hilarious. Since it kinda needs a little more salt. In the recipe? Get it? Yeah...

Homemade Pesto Rolls
Yields about 3 dozen
2 1/2 cups flour + 2 cups flour
1 1/2 TB active yeast
1 cup warm milk
3 eggs
1/2 cup sugar
1/2 cup shortening
2 tsp salt
Pesto for filling-recipe follows

Mix your flour and yeast together. In a saucepan heat milk, shortening, and salt on stove top til shortening is just melted. Let sit til the milk is warm to the touch, not hot. Add to the dry ingredients and add eggs. Beat on low with a hand mixer for 30 minutes and then 3 minutes on high. By hand stir in 2 cups of flour to form dough. Knead the dough until it is smooth (about 5-8 minutes) Place in a greased bowl and let rise in a warm place until doubled (2 hours at least) Punch down dough divide into three parts. Let rest for ten minutes. Roll each section in rectangles. Cut your rectangles into 12 triangles. Spread the pesto thinly on the triangles and roll up starting with the widest end. Place on a cooking sheet or baking stone and let rise again for at least an hour. Brush with milk and bake at 375 until golden brown. Brush hot rolls with melted butter and serve warm or at room temperature.

Homemade Pesto
2 packed cups of clean basil leaves
2 cloves garlic
1/4 cup of pine nuts or walnuts (I used pine nuts)
1/2 cup olive oil
1/2 cup freshly grated Parmesan cheese

In a food processor pulse the basil leaves, pine nuts, and garlic cloves until coarsely chopped. Slowly add olive oil to mixture 1/4 cup at a time, processing until smooth. Season it with salt and pepper. Stir in the cheese. You can keep this in the refrigerator for about three days.